
Bookings
How to Add a Booking
Create a confirmed wedding booking, add client details, record the package total, and set the payment schedule.
Bookings keeps client details, dates, payments, questionnaires, invoices, and projects together.
If the couple is still deciding, keep them in Leads until they are confirmed.
Open a new wedding booking
Add a booking once the couple has confirmed.
- 1.
In the left navigation, select Bookings.
- 2.
Stay on the Weddings tab.
- 3.
Select Add Booking.
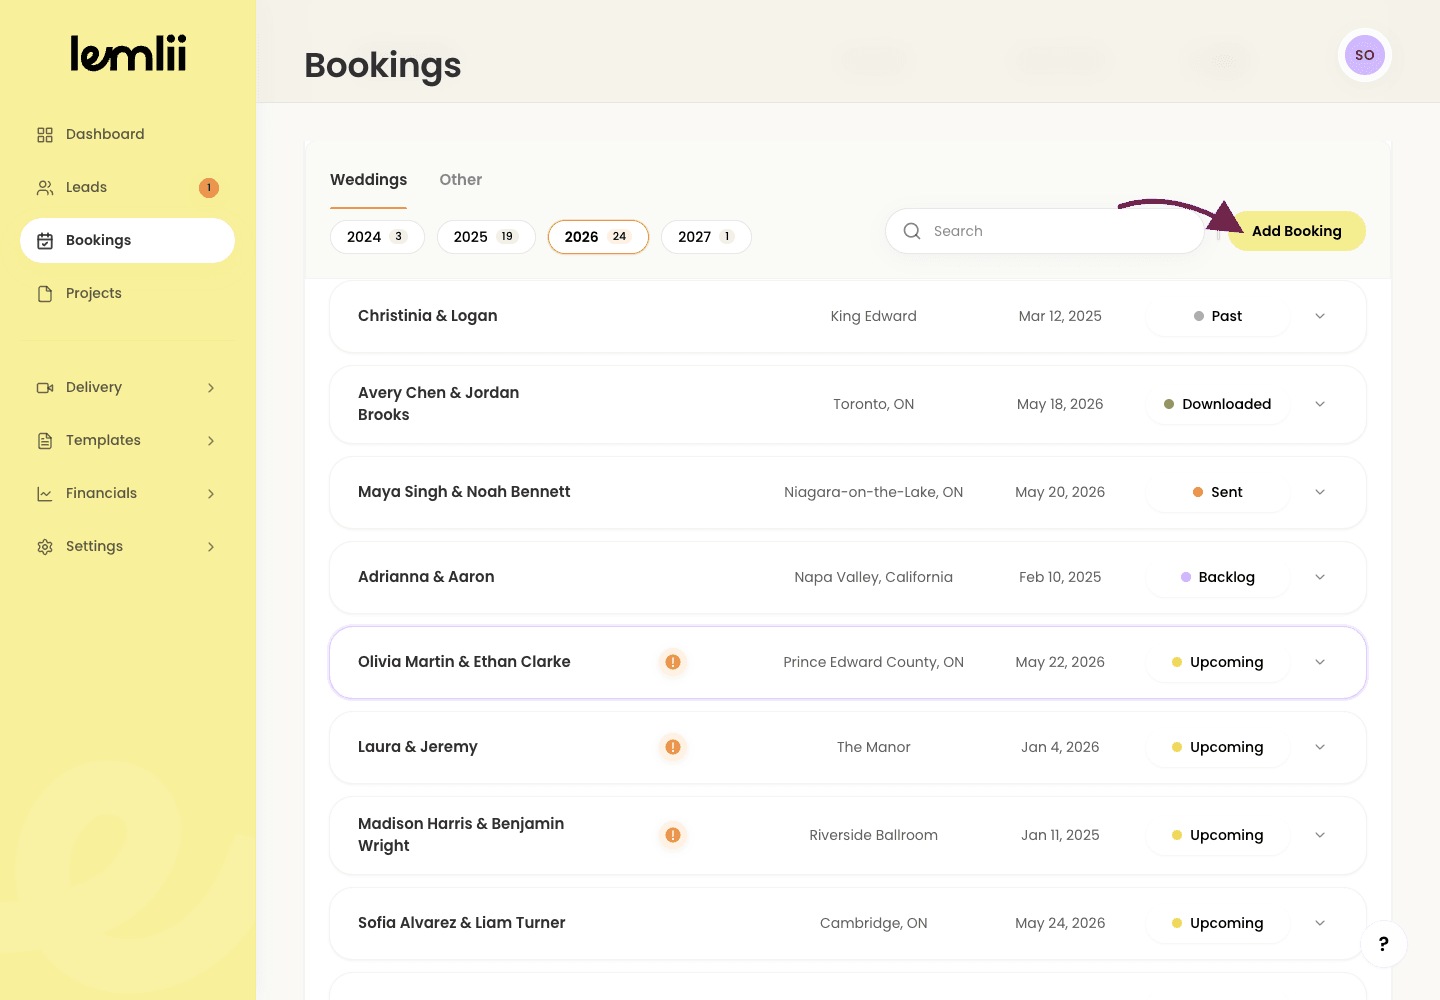
Add Booking button on the Bookings page - 4.
Confirm that the new wedding-booking form opens.
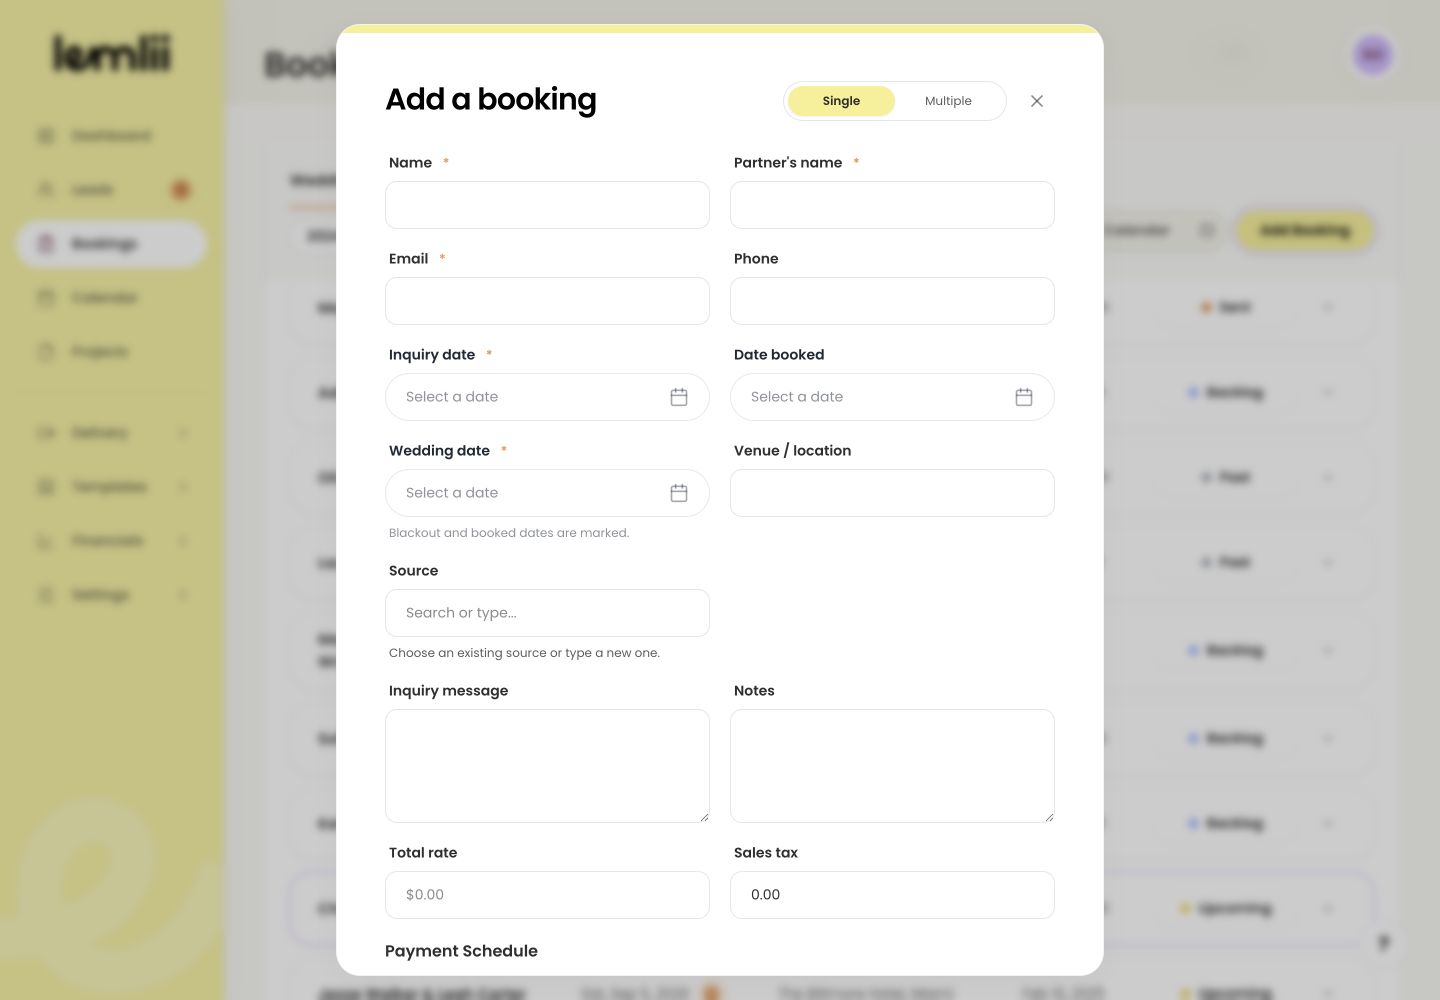
Create booking form
- 1.
Required wedding and contact information
Fill in these required fields:
- Name and Partner's name: the couple attached to the wedding booking.
- Email: the primary address used for the booking.
- Inquiry date: when the original inquiry was received.
- Wedding date: the confirmed event date.
Helpful details to add when available
Add these details if you have them:
- Date booked: when the couple confirmed the work.
- Phone and venue / location: the current contact and event-location information.
- Source: how the couple found you.
- Inquiry message: the original request or summary of what the couple asked for.
- Notes: private notes.
Build the booking payment schedule
Enter financial information only when it matches the confirmed agreement.
- 1.
Enter the agreed Total rate.
- 2.
Review or enter the applicable Sales tax.
- 3.
Add, remove, or update Payment Schedule rows to match the agreement.
- 4.
Set the amount and due date for every milestone.
- 5.
Confirm the scheduled amounts equal the booking total plus tax.
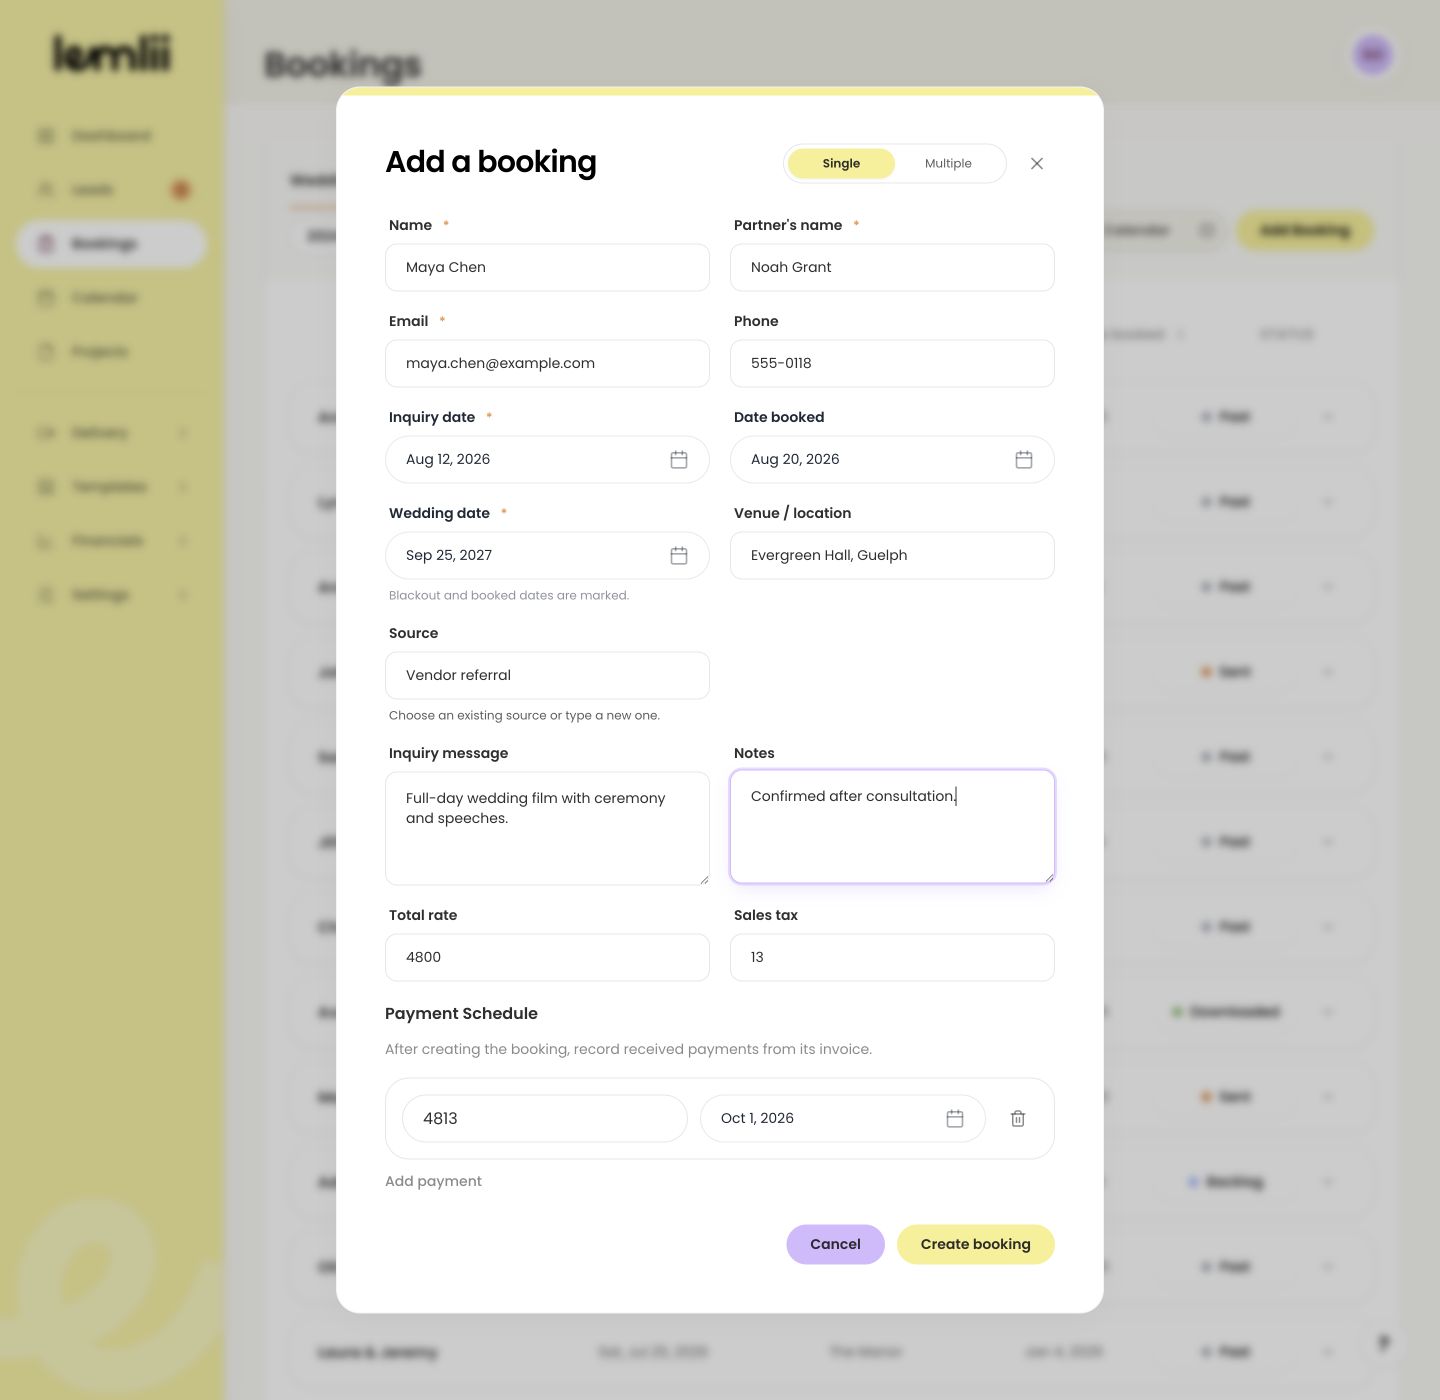
New booking financial details and payment schedule
- 1.
Check the details
Review the complete booking before creating it.
- The couple names and primary email are accurate.
- The inquiry and wedding dates are correct.
- You’ve checked any date conflict or caution.
- The venue, source, message, and private notes are in the appropriate fields.
- The total, tax, payment amounts, and due dates match the confirmed terms.
Save the booking
Save, then check the booking in the table.
- 1.
Select Create booking.
- 2.
Locate the new booking in the Bookings table.
- 3.
Confirm the couple, event date, booking type, and current status.
- 4.
Expand the booking and review its connected questionnaires, proposals, invoices, and project work.
- 1.
Sending documents and recording payments
Adding a booking does not send documents or take payment:
- It does not automatically send a proposal, questionnaire, invoice, or gallery.
- It does not collect or record a payment.
- If the client is already in Leads, move that lead to a booking to avoid a duplicate.
Notes
- If this client already exists as a lead, use How to Move a Lead Into a Booking so you do not create a disconnected duplicate.
- Use Record payment from the invoice only when you can verify that the money was received; creating a booking does not collect or record payment.